Bianco DiNapoli
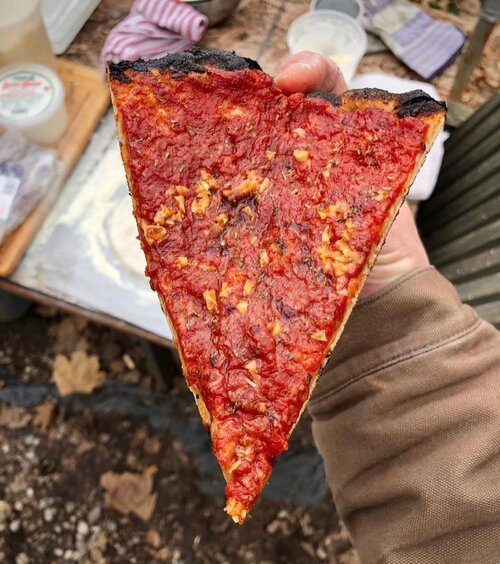
New York Style Pizza Sauce
We’ve been big fans of Chris Bianco’s Pizzeria Bianco in Phoenix, Arizona since a mind-blowing visit in 2015. He’s considered by many to be America’s top Pizza Maker, an idea nearly cemented by his appearance on Netflix’s Chefs Table: Pizza. It wasn’t hard for our pizza-obsessed selves to find ourselves begging for an opportunity to use Chris’ new ‘New York style’ pizza sauce, and now we’ve got it. Throw your friends a pizza party. Drink some wine. It’s a great way to start the year.

Bianco DiNapoli Tomatoes are organically-grown and harvested in Northern California. Long summer days and fertile soil produce these very unique & delicious tomatoes. Within hours of harvest, our plum- shaped tomatoes are washed, steam-peeled and hand selected at the cannery. Each can of the original whole-peeled is packed with a touch of sea salt, organic basil then topped in its own juices. We hope you enjoy them as much as we do!


Recipe: Chris’ Pizza Dough
Ingredients
1 envelope active dry yeast
2 cups warm water (105° to 110°F)
5 to 5 1/2 cups bread or other high-protein flour, preferably organic and freshly milled, plus more for dusting
2 teaspoons fine sea salt, Extra virgin olive oil, for greasing the bowl
Directions
Combine the yeast and warm water in a large bowl. Give the yeast a stir to help dissolve it, and let it do its thing for 5 minutes. You’re giving it a little bit of a kick- start, giving it some room to activate, to breathe.
When the yeast has dissolved, stir in 3 cups of the flour, mixing gently until smooth. You’re letting the flour marry the yeast. Slowly add 2 cups more flour, working it in gently. You should be able to smell the yeast working— that happy yeast- y smell. Add the salt. (If you add the salt earlier, it could inhibit the yeast’s growth.) If necessary, add up to 1/2 cup more flour 1 tablespoon at a time, stirring until the dough comes away from the bowl but is still sticky.
Turn the dough out onto a floured work surface and get to work. Slap the dough onto the counter, pulling it toward you with one hand while pushing it away with the other, stretching it and folding it back on itself. Repeat the process until the dough is noticeably easier to handle, 10 to 15 times, then knead until it’s smooth and stretchy, soft, and still a little tacky. This should take about 10 minutes, but here, feel is everything. (One of the most invaluable tools I have in my kitchen is a plastic dough scraper. It costs next to nothing, and it allows me to make sure that no piece of dough is left behind.)
Shape the dough into a ball and put it in a lightly greased big bowl. Roll the dough around to coat it with oil, then cover the bowl with plastic wrap and let the dough rest in a warm place until it doubles in size, 2 to 2 1/2 hours. When you press the fully proofed dough with your finger, the indentation should remain.
Turn the proofed dough out onto a floured work surface and cut it into 4 pieces. Roll the pieces into balls and dust them with flour. Cover with plastic wrap and let them rest for another hour, or until they have doubled in size.
The dough is ready to be shaped, topped, and baked. If you don’t want to make 4 pizzas at a time, the dough balls can be wrapped well and refrigerated for up 8 hours or frozen for up to 3 weeks; thaw in the refrigerator and let come to room temperature before proceeding.
SHAPING THE DOUGH:
Hold the top edge of a piece of dough with both hands, allowing the bottom edge to touch the work surface, and carefully move your hands around the edges to form a round of dough. You have to find your own style, but
I usually just cup my hand into a C shape, turn my hand knuckle side up, and drape the dough off it, allowing gravity to do its work, so it gently falls onto the floured table. Imagine you’re turning a wheel. Hold that dough aloft, allowing its weight to stretch it into a rough 10-inch round. Don’t put any pressure on it by pulling or stretching it, just let gravity do the job— you want that aeration and cragginess. Keep it moving, and it will start to relax— like we relax when we are on a sofa.
At this point, you’re ready to make a pizza. Lay the dough on a lightly floured pizza peel or inverted baking sheet. Gently press out the edges with your fingers. You will start to see some puffiness or bubbles now. Jerk the peel to make sure the dough is not sticking. If it is, lift the dough and dust the underside with a little flour (or, if no one is looking, blow under it very gently). Tuck and shape it until it’s a happy round.
Top the pizza as per the instructions in any of the recipes that follow.
PROOFING DOUGH:
In the Bianco Pizza Dough recipe, you proof the dough for 3 hours, then divide it into balls and let it proof for another hour before you bake it. It tastes good. No problems. But what happens if you proof it for 7 hours? What if you let it go for 24 hours? It will be different, and that difference might be more to your taste than the basic dough. At 3 hours for the first proof, you will have a dough that will brown more quickly than a dough that's proofed for 14 hours, because the yeast will not have converted as many of the sugars. The longer the dough proofs, and the more sugars are converted, the more it will have that alcoholic smell of fermentation, and the more the sour flavors will develop. Many people love those flavors—l ike a good sourdough bread— but here I don't necessarily want too many of them, because I don't want them to dominate the flavors of the pizza toppings. That said, there is no wrong way to go here. Make the dough a few times, following the recipe, until you feel comfortable. Then start to play with it. Determine how long a proof you like.
Bear in mind that where you are in the world will also play its part. If you’re making the dough in Iceland, it's going to be different from making it in Phoenix. The climate is different, so it may need to proof for a little longer than 3 hours to start. Your water will be different, and it will affect the flavor of your dough. Never forget, we’re only dealing with four ingredients, and each one brings its own flavors and qualities to the pizza. So record the process as you go. Work with your sense of taste and your broader sensibility of the things you like. This basic dough recipe is only an early survey of a journey you get to finish yourself.